Configuring Document Publishing workflows
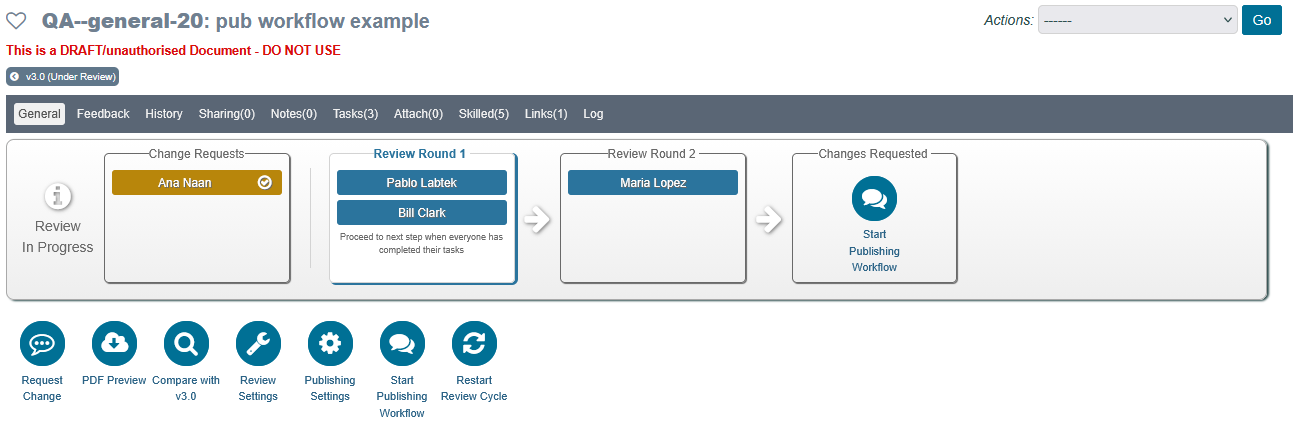
The Publishing Settings button opens a pop-up window where a publishing workflow can be assigned to the document. The button is only available to users with the ‘(Doc Type):Edit Workflow Settings’ permission, it is not shown on superseded or disabled documents, and it is hidden while a publishing workflow is in progress. If the assigned workflow is not ready to use, the pop-up window displays the warning, “Publishing workflow is set but is not currently configured.” It is also possible to set publishing workflows outside of a document even before it’s created. Please refer to the user guide, Workflows for further details about available options to assign workflows and also about how to create global and custom workflows.
When no publishing workflow has been assigned, the field, Publishing Workflow will display the option, ‘None (manual authorisation)’. Clicking the field unfolds a dropdown menu which also offers a Custom Workflow and the publishing workflows available to the document’s OU. Only workflows which are ready to use (configured with users) are listed. These include workflows owned by the OU, workflows shared with the OU and, if the document has been moved from another OU, the workflow currently assigned to it.
If the OU has a default publishing workflow for the document type and the OU is set to lock it, the Publishing Workflow field is greyed out and cannot be changed. If the document has no workflow in this case, the pop-up window only displays a message that the publishing workflow is not configured.

An available publishing workflow can be selected or a local custom workflow can be created:
- To use an available publishing workflow (or to go back to None (manual authorisation)), select it from the dropdown menu and click Save. The Save button only appears once the selection differs from the current one.
- To create a local custom workflow, select Custom Workflow. An editable workflow form opens in the pop-up window; configure it and click Create Custom Workflow. The custom workflow is created and assigned to the document straight away, so there is no separate Save step.
If there was no publishing workflow assigned before, the Authorise Document button (and the Request Authorisation button, which is only shown when the account has the option to request authorisation enabled) will be replaced with the button, Start Publishing Workflow. This happens once the assigned workflow is ready to use and has publishers in its first round. Please note:
- The Start Publishing Workflow button is only shown to users who can start publishing workflows, and not while a publishing workflow is already in progress.
- If the current user is the only publisher in the workflow, the button is labelled Publish Document instead.
- If the workflow has approvers but no publishers in the first round, the Authorise button remains and is labelled Publish Document.
- If the assigned workflow is not configured (not ready to use), the Authorise Document and Request Authorisation buttons remain.
Not Using Publishing Workflows
It is perfectly acceptable to not use publishing workflows and just use the basic Authorise or Request Authorisation buttons to publish a document. The next article covers this option.
Next Step:
The next article covers Authorising & Publishing New Versions of Documents
Previous Step:
The previous article covers Creating and Editing New Versions Of Documents
Was this article helpful?
That’s Great!
Thank you for your feedback
Sorry! We couldn't be helpful
Thank you for your feedback
Feedback sent
We appreciate your effort and will try to fix the article